Sunday 27 November 2011

Thanksgiving Week: Pumpkin Pie Slice

Americans have it easy - go to the store; buy a can of pumpkin puree, a box of 'pumpkin pie spice', a pre-made pie crust and bam! - almost instant pumpkin pie.

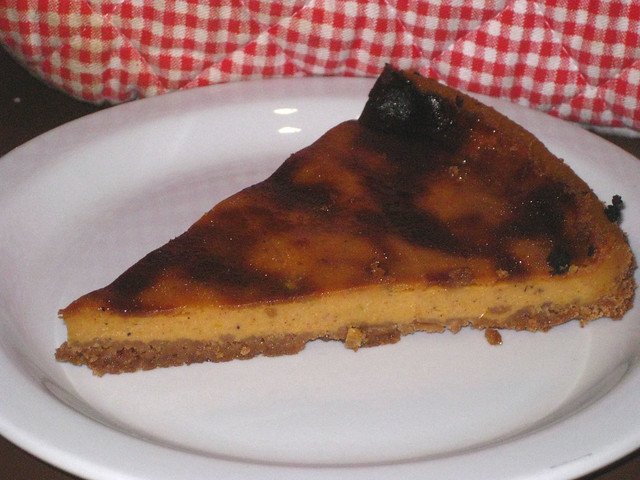
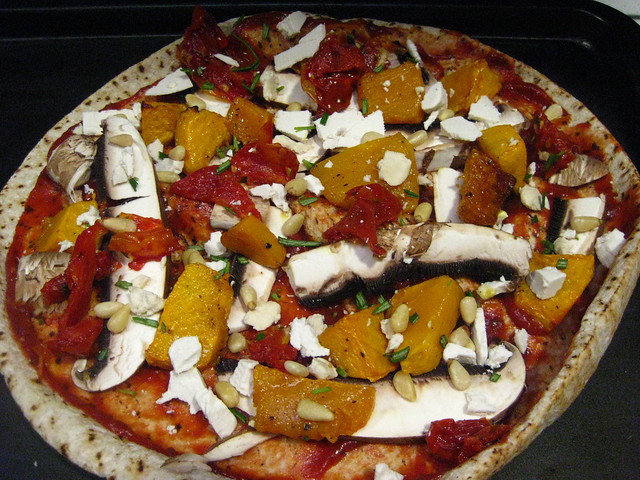
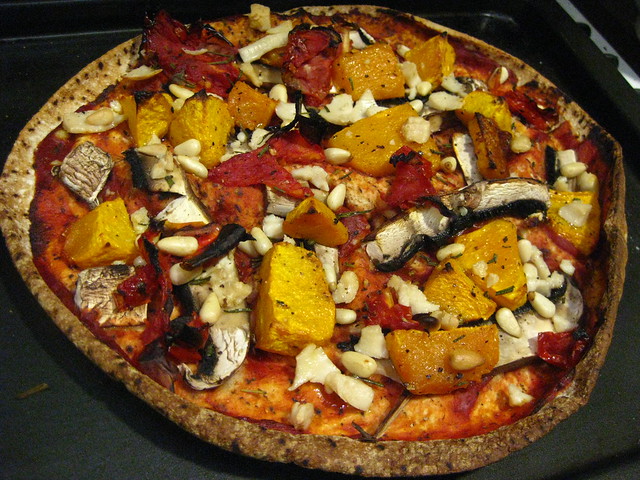
Not so in Australia. Though Australians are the biggest consumers of pumpkin I've ever encountered, pureed pumpkin is just not available here. Nor is a pre-made graham cracker crust (good luck even finding a graham cracker!), and pumpkin pie spice - just forget about it. So that meant I had to crush some gingersnap biscuits by hand, using a cocktail muddler (I'm getting a food processor for Christmas I hope!), roast and puree my own pumpkin and make my own spice mix. This pie was a monumental pain in the a$$ to make and I don't think it will be happening again anytime soon, but at least it turned out pretty tasty!

Oh, and due to lack of planning and pie tin, I used a tart pan instead - it turned out to be more of a slice-like dessert than a pie, which I think I am cool with.

Ingredients for the crust:

  • 1 pack Coles-brand gingersnap cookies plus 4 (about 300g all together)
  • 2 tbsp sugar
  • 5 tbsp Nuttelex, softened


Ingredients for the pie filling:

  • 2 cups pumpkin puree
  • 3/4 cup Tofutti cream cheese
  • 1/2 cup brown sugar
  • egg replacer to replace 2 eggs
  • 1/4 cup cornflour
  • 1 tsp vanilla extract
  • 1.5 tbsp maple syrup
  • 1 tsp cinnamon
  • 1 tsp nutmeg
  • 1 tsp allspice
  • 1/2 tsp salt


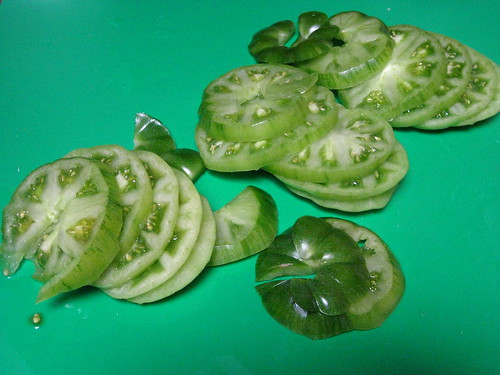
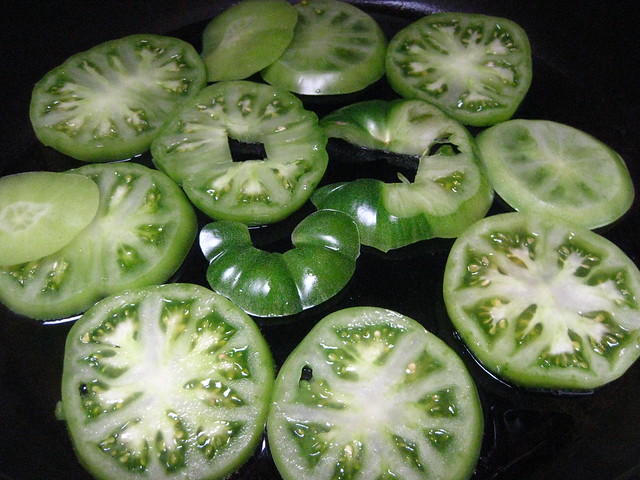
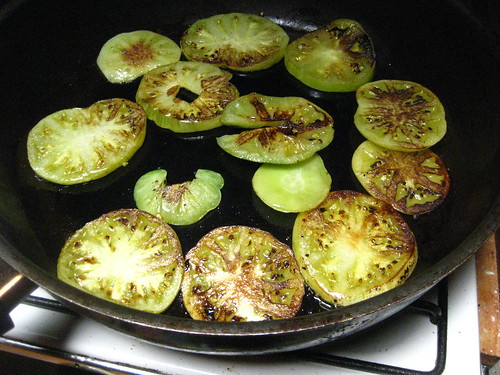
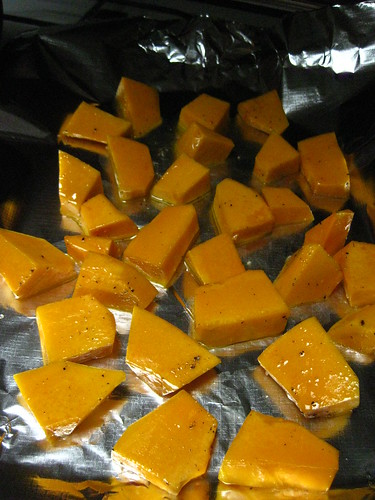
A note on pumpkin: I found (after wasting half a pumpkin!) that the best way to obtain an awesome pumpkin puree is with Butternut pumpkin - half a fairly big one will get you 2 cups - roasted in a water bath. If you dry-roast, the pumpkin will be too chewy on the outside, may burn, and will not puree as well. Wash and slice the pumpkin, place face-down in a water bath and roast on 200'C for about 20 minutes. Flip the slices and roast for another 20 minutes or so - you may need longer. You can then easily cut the skin from around the edges of the pumpkin. I then cut it into chunks and blended with my hand mixer.

Okay, so, for the crust: soften your Nuttelex in the microwave and add to the crushed biscuits and sugar. Mix with a fork until the butter is absorbed. Now mix with your hands to make sure the butter is well combined. Spray your pie tin with cooking oil and press the crumbs evenly all around the bottom and sides of your tin. Bake in the oven for 10-15 minutes on 200'C. While this is baking you can mix the filling elements together.

Seeing as this recipe was a total "winging it" sort of deal, I was a naughty chef and just threw all the filling ingredients in together at the same time, then blended. I tasted it after this and was (surprisingly!) happy with the results, so I didn't need to add anything - though you could add other spices, soy milk, more maple syrup, bourbon, more sugar - whatever really.

Make a crust-protector out of foil and fold over the edges of your crust and and pan, so the crust doesn't burn. I completely forgot to do this (Pie-Making 101 failure...) and my crust burnt. The pie was easily saved after baking, but I would have enjoyed a bit more crust.

Bake at 200'C for about 20 minutes, then turn the heat way down to around 125'C for another 40 minutes or so. The pie is done when the sharp knife stuck in the centre comes out clean. Serve with vanilla ice cream and drizzle with maple syrup.

IMG_2469


That's it for Thanksgiving Week - I might do a quick recap of a T-day menu and some other notes in the next couple of days, but today I am preparing for the upcoming Picnic Fortnight where I will be blogging picnic recipes for two weeks!

Friday 25 November 2011

Thanksgiving Week: Semi-Candied Beetroot and Asparagus

I've never actually had candied yams, as I'm not a big fan of putting sweet things in savoury food, but I thought I'd try putting a festive spin on what would otherwise just be some roasted veggies - but I don't really like yams (too sweet! they're weird!) so I decided to try it out on some beetroot and asparagus instead.

Ingredients to serve 2 as a side dish:

  • 1 large beetroot, diced
  • 1 bunch of asparagus
  • 1 tbsp balsamic vinegar
  • 1 tbsp olive oil
  • 1 tbsp maple syrup
  • 2 cloves garlic, slivered
  • a couple of pinches of salt

Preheat your oven to 200'C. Cut your beetroot into large chunks and cut the bottoms off the asparagus. Mix the three liquids together (the oil will separate but that's okay). Lay the asparagus on your baking tray, and spoon half your liquid on top. Salt the asparagus.

Put the beetroot into a bowl, salt, and add the rest of the liquid. Mix until all the pieces are coated with liquid. Get this onto the baking tray and put it into the oven. Cook for about 10 minutes, then flip. If you need to spoon some escaped liquid back on to the veggies, go for it.

Cook for another 10 minutes or so until a everything is a bit crispy and shiny.

IMG_2450

IMG_2449


Thursday 24 November 2011

Thanksgiving Week: Stuffing

As I was typing up this recipe it suddenly seemed like such an easy dish to make. It needs to sit in the fridge overnight and also cook for quite awhile, so it feels like it takes ages, but the preparation time is super-short and stress-free.


Ingredients to serve 4 as a side dish:

  • 3/4 loaf bread
  • 1 diced white onion (or other sweet onion)
  • 2.5 tbsp Nuttelex, softened (plus more for cooking)
  • 1 giant handful of breadcrumbs
  • 1 giant handful of parsley, minced
  • egg replacer equal to 2 eggs
  • a few shakes vegeta
  • a few grinds black pepper


Soak the bread in warm water for 30 seconds, then squish out excess water. Add the rest of the ingredients and squish together with your hands for about five minutes until everything is well combined. Cover and leave in the fridge overnight. 

Spray cooking oil on the bottom and sides of your cooking dish and put your stuffing in. Dot the top with Nuttelex, sprinkle the top with breadcrumbs and dot again with Nuttelex.

IMG_2446

Cover with a sheet of tin foil that has been sliced in the centre (to keep the top from burning and to let steam escape!)

IMG_2452

Cook in a preheated oven at 200'C for about 1 hour and 45 minutes, until the top and sides are crispy. Let rest for about 10 minutes. 

IMG_2453

Serve next to roasted veggies or any other of my Thanksgiving Week dishes!

IMG_2454


Wednesday 23 November 2011

Thanksgiving Week: Parsley Potatoes

I've just realised that on Thanksgiving we never really had a main meal, just a whole bunch of sides. (Like, probably 12. I will try to compile a list later this week.) This is a recipe for parsley-fried potatoes. They are just the yummiest - and also green! This is an easy recipe, and takes about an hour - most of which is cooking time.

Ingredients to serve 3-4 as a side dish:

  • 6 medium-sized potatoes, cut into chunks
  • 2 heaping tbsp Nuttelex
  • giant handful of parsley, minced
  • a bit of salt
  • water for boiling

The first step is to parboil the potatoes - cook them in a pot of boiling water until just tender, then drain (I like to scratch them up a bit with a fork to make them extra crispy when cooking). In the mean time, mince the parsley and put into a pot with the Nuttelex.

IMG_2424

Cook slowly and stir until the Nuttelex turns green, then add the potatoes, stirring until covered in parsley. Add salt as you stir.

IMG_2425
IMG_2426
IMG_2427

Cook on medium-low and then medium heat until they're a nice reddish-brown colour.

IMG_2428

Stir fairly often, but not too often - I stir as soon as I notice one side of the potato is starting to brown. I also like to gradually increase the heat throughout cooking so as to end up with a nice crispy potato! Serve with a bit of ketchup and as many more side dishes that will fit on your plate!

IMG_2429


Tuesday 22 November 2011

Thanksgiving Week: Sautéed Red Cabbage

Another Hungarian-inspired side-dish, also called párolt piros káposzta, this recipe is actually quite similar to the cucumber salad recipe I posted yesterday. The main differences being this one is served warm instead of cold and uses cabbage instead of cucumber. 

Ingredients:
  • 1/2 of one large or one whole medium-sized red cabbage, sliced
  • a bunch of salt
  • 1/4 cup oil
  • 1/2 cup water
  • 3/4 cup white vinegar
  • 1 tbsp sugar (plus more to taste, if necessary)

Slice the cabbage and add to your pot in layers, with a few grinds of salt in between each layer. When the cabbage is all sliced and salted, let stand in the pot for ten minutes. Unfortunately, sliced red cabbage looks like brains. For this, I am sorry.


IMG_2378

In the mean time, mix the water and vinegar in a cup - add sugar and stir until the sugar is dissolved. Drizzle oil over the cabbage then add your water/vinegar/sugar mixture.


Cook on medium heat, stirring every five minutes or so. This will take about an hour or so to cook - it is done when all the liquid is gone and your cabbage is a red/brown. When it's looking 20 minutes off done, taste and add additional sugar or vinegar if necessary. This makes heaps - enough to serve about six people as a side dish, depending on the size of your cabbage.


Photobucket


Here is the cabbage served with cucumber salad, roasted potatoes and tofu steaks!

IMG_2402


Monday 21 November 2011

Thanksgiving Week: Hungarian Cucumber Salad

This time of year everything gets CRAZY, hence no blogging. But I intend to pick it up! This week I will be doing a series of posts to honour my American heritage. I moved to Australia in my teens, but before that, Thanksgiving was my favourite holiday - and my family had the BEST Thanksgiving. Clueless friends and acquaintances would always go "OOOh, but what could you possibly eat? What is Thanksgiving without the turkey?" Heathens! Little did they know how much they, in fact, were the ones missing out.

Some of the Tofurky-day dishes I miss the most are kind of impossible to make here due to lack of specific ingredients, but I will be posting some side dishes (and if I can swing it, a classic dessert) that are yummy comfort food and also delicious! Most of them are variations on traditional Hungarian fare, and may look and sound weird but actually turn out quite lovely.

This cucumber salad dish isn't a salad in the traditional sense - I think it to be more of a cold soup. But then again, I don't mind slurping up vinegar and raw garlic! Prep time: very short (plus sitting); Serves: at least six

Ingredients:

  • 2 large cucumbers
  • 3 cloves garlic, minced
  • salt, lots of salt
  • 1/2 cup water
  • 3/4 cup white vinegar
  • heaping tbsp sugar
  • heaping tbsp sour cream
  • heaping tbsp Hungarian paprika

Peel your cucumbers, then slice them with a mandolin - they need to be as thin as possible.

IMG_2368

IMG_2369

After each half of a cucumber is sliced, sprinkle some salt on top (I grind sea salt over it). Once both cucumbers have been sliced, and salt layered, mix to evenly distribute the salt and let stand for 10 minutes. While you're doing this, mince the garlic and create a solution of water, vinegar and sugar. Stir the sugar/water/vinegar mixture until the sugar is dissolved. Add the garlic and the liquid mixture to the cucumbers.

IMG_2370

Add the sour cream and sprinkle the paprika over the top.

IMG_2371

IMG_2375
Stir until combined, cover and refrigerate for at least 3 hours. (Best if let sit overnight!) Serve cold, in a small bowl - and yes, the salad "dressing" should be slightly pink.

IMG_2400


(Oh, and in case you were wondering, we never actually ate Tofurky on Thanksgiving - but were sure to snap up the post-holiday clearanced items for pre-Christmas Tofurky dinners!)

Saturday 12 November 2011

Fried Green Tomatoes

One of my favourite breakfasts to make on a sunny Saturday morning is fried green tomatoes on toast. FGTs is a traditional American "soul food", usually prepared breaded and served as a side dish. I prefer them fried, however, in just a bit of olive oil, with no breading. Green tomatoes, when cooked, give off a sweet/sour taste - a taste that is not easily compared with another food. It's something you just have to try.

Green tomatoes can be hard to find in shops, and even difficult to find at fruit & veg markets. Two places that usually have them are Mecca Bros Grocery in Clifton Hill and the Richmond Gleadell Street Market - look for "Adelaide Tomatoes". The best tomatoes to use are the greenest ones - if there's even a hint of red on the outside of the tomato, it is too ripe, and will not taste as good nor have as good a texture when cooked. Hint: you may need to look towards the bottom of the pile, as people are more inclined to buy the red tomatoes and the shops usually hide the green ones!

Here is the recipe I use to serve 2-3:

Ingredients:

  • 3 medium green tomatoes
  • 2 tbsp olive oil (roughly)
  • salt
  • pepper
  • a few slices of really nice bread, thickly sliced is good
  • vegan mayonnaise (Kingland brand tastes best but the Praise stuff will do in an emergency)

First, slice the tomatoes into slices about the width of half of a letter key on your computer's keyboard. Heat up the olive oil in your pan then spread out tomato slices in a single layer in your pan- you may need to cook them in batches, depending on the size of your pan. Keep the heat on med-high.

IMG_2351  IMG_2353

Grind some salt and pepper over your tomato slices and cook them for about seven minutes on each side. I usually flip them when the bottom side is a nice brown, salting and peppering the opposite side as well. They're done when both sides are brown and the tomatoes start to fall apart when moved with your flipping utensil (I use a fork).

IMG_2356

I like to toast my bread under the griller, so one side is toasted and one side is soft. Spread the mayo on the toasted side, and top with a layer of FGT. Enjoy with a long black coffee.

IMG_2360


Friday 11 November 2011

Easy Pita Pizza

Today was such a nice day I couldn't be bothered spending heaps of time making dinner. I was even going to be so lazy as not to post anything when I'd planned to, but I decided that I have time, in between cocktail-drinking and karaoke-practicing, to do a quick post. (For my next karaoke outing I'm trying to decide between four Heart songs. If you have a suggestion as to the best Heart song for a karaoke setting, I'd love to hear it...)

IMG_2348

Anyway, this is the easiest pizza ever. The recipe goes: Pita bread + sauce from a bottle + toppings + oven. Nom! For my toppings, I went with roasted pumpkin (okay, so I'm not that lazy, I did roast the pumpkin myself...but I chose it from the supermarket based on it being the easiest piece to cut!), mushroom, semi-dried tomatoes, pine nuts, Sheese (blue and mozzarella) and some chopped rosemary from the garden. Oh, and some cracked pepper and sea salt on top.

Before and after shots:

IMG_2349

IMG_2350

Tuesday 8 November 2011

Chemical-Free Insect Repellant for My Garden

Recently I have noticed that bugs seem to be particularly attracted to some of my plants - if I didn't do something quickly, my mint, spring onions, lettuce and cucumber were in danger of becoming extinct. There are various natural insect repellant spray recipes around the interwebs and, as with my most of my recipes, I couldn't decide which one to use so I combined about three recipes and came up with this:

Ingredients:

  • half a large brown onion, diced
  • 7 cloves of garlic, chopped
  • tbsp of chili powder
  • hot water
  • tbsp of plant-based dishwashing soap


I put the onion, garlic and chili powder into an empty jar and filled it to the top with hot water. I put the lid on it and let it steep for about two hours, until the water was no longer hot. I drained the onion/garlic/chili water through a colander then poured the liquid, plus the soap, into a spray bottle and got to work spraying all the leaves in my garden. (You might want to wear a bandana across your face so you don't pepper-spray yourself!)

I hope this works - I don't want to kill bugs, but I am sick of them eating my plants, so hopefully this will keep them away. I will post an update in the future as to the success or failure of the spray.

If you've got a vegan insect-repellant recipe that works, please leave it in the comments!

IMG_1894

In other news, I counted six tomatoes growing in the garden, and one two-inch-long zucchini. At least some of my veggies have escaped the wrath of the insects and are off to a good start!


Saturday 5 November 2011

Creamy Mushroom Asparagus Pasta

This recipe turned out a lot better than I thought it would. I used the leftover cream from the fridge, and it worked much better in this dish! This sauce is also simple and fairly quick to make.

Ingredients:

  • 5 medium portobello mushrooms, sliced
  • 1 bunch of asparagus
  • 1/2 cup vegan cream
  • 1/2 cup soy milk
  • 1/2 cup veggie stock
  • 2 tbsp sour cream
  • 1.5 tbsp cornstarch
  • 1/2 tbsp canola oil
  • 1/2 tbsp Nuttelex 
  • 2 medium cloves garlic, minced
  • 4 tsp lemon juice (divided into two lots)
  • salt
  • pepper
  • 1/2 pack of the long pasta of your choice (I used spaghetti but linguini probably would have been better)


First, get your pasta on to boil. If you're using a long pasta, remember to stir it with a fork as frequently as you can so it doesn't stick together while cooking.

IMG_2336

Now, cut the ends off of the washed asparagus and then cut the stalks into five sections. Heat the oil in a pan and sauté the asparagus pieces for about 5 minutes on med-high heat, adding a pinch of salt, a pinch of pepper and half of your lemon juice. Remove from heat and set aside.

IMG_2335

Next, heat the Nuttelex in the pan and add the garlic. Before the garlic turns brown, add the mushrooms and cream. As the cream melts, stir it to distribute it around the pan. Add half of your soy milk, the sour cream and the stock. Slide your mushrooms to the outside of the pan and add your cornstarch to the centre, stirring into the liquid until it is dissolved.

IMG_2337

Add the rest of your soy milk and some salt and pepper. The sauce will start to thicken, though it may seem quite soupy at this point! Add the asparagus and the rest of your lemon juice and cook until the sauce has the perfect amount of sauciness - not too soupy and not too thick. (You can always add more stock or lemon juice as necessary.)

Your pasta should be cooked by now, so drain it and pour it into the pan with the sauce. Fold until combined and served with fresh pepper and maybe some Murray River salt flakes.

IMG_2339

Wednesday 2 November 2011

A Tomato Grows in Melbourne

I know Melbourne Cup Day is the traditional time to plant out the garden - especially tomatoes. But I don't celebrate Cup Day, and I am impatient, so I planted them weeks ago. They have been nice and insulated courtesy of Yarra Council but I was still worried that they were flowering way too early. I have only grown tomatoes in this climate a few times, and this is the first time in pots - so a bit of tomato-flower-panic set in.

I have since been assured by multiple (knowledgeable) people that just because they are flowering early does not mean they will die early! And yesterday I was excited to see the first little cherry tomato starting to grow!

How cute is it! I think I'm in love.

IMG_2333


Tuesday 1 November 2011

Hungarian Mushroom Soup

I have my mother's recipe for this soup stored in my computer. It says this:


1 box of mushrooms
water equal to = 2/3 to 1/3 mushrooms
parsley
vegeta

put all in pot, cook for 30 min after boil

little bit of soy milk
when it's boiling again, add noodles
make the roux
add it, obviously
add a 2-3 tbsp. of sour cream and cook until dissolved


Up until right now, every time I have made this soup I have needed to do some deciphering. This time I actually called my mother to ask her how many mushrooms a "box of mushrooms" constitutes. So, here is my translated recipe:

Ingredients (to serve six):

  • 400g button mushrooms
  • 2 tbsp of Vegeta (or your preferred veggie stock)
  • half a bunch of parsley, washed, with the ends cut off (keep as much of the stem as you can!)
  • a pot of water, filled about 3/4 of the way up to the top
  • 4 tbsp soy milk
  • 1 heaping tbsp all-purpose white flour
  • 1 heaping tbsp Hungarian paprika
  • 2-3 tbsp vegetable oil
  • 1/2 cup orzo pasta
  • some white vinegar
Slice the mushrooms and put into the pot. Cover with water abut 3/4 of the way up to the top of the pot. Add parsley and Vegeta. Bring to the boil then cook for about 30 minutes.

IMG_2321

Add the soy milk and pasta and start on your roux.

IMG_2323

This is the most complicated part of the dish. There are a million ways to make roux, but this is the way my Hun relatives have always made it. It is best to cook it quickly on high heat, but it cooks fast and is easy to burn, so it's okay to put it on medium heat if you've not made it before.

The roux:

Pour the vegetable oil into a small, shallow saucepan, so that the oil covers the whole bottom of the pan. Once the oil is hot, add the flour. Stirring constantly, wait until the flour starts to turn a golden brown then add the paprika. Keep stirring! Stir stir stir for about two minutes so it is a deep red/brown and then pour into the soup pot. Scoop up some of the soup water into the saucepan, swirl around to get as much of the roux out as possible, and then pour back into the soup pot.

IMG_2324  IMG_2326

Cook the soup for about ten more minutes until the pasta is cooked then add the sour cream and stir slowly until it has dissolved. Fish out the big pieces of parsley and discard them.

Serve each bowl with another teaspoon of sour cream on top and about 1/2 teaspoon of white vinegar. (PS - there is no picture of this soup because I don't have a pretty enough bowl to make it look attractive enough...it tastes yum, but is kind of ugly...)