Monday 31 October 2011

Treat: Chocolate Peanut Butter Cups!! and Trick: Last Day of Vegan MoFo

We actually had Treat-or-Treaters come asking for candy tonight...the first I have ever encountered in Australia (if you're reading from the US, know that it's not really done here!). Luckily we had a bag of lollies laying around or they probably would have gotten some carrots from the fridge instead...

Anyway, in the spirit of Halloween and the last day of Vegan MoFo, I decided to make some peanut butter cups - in the style of Reese's Peanut Butter cups, a staple of any American child's Halloween haul.

This recipe is a combination of a few found on the web - it is also super easy!

Ingredients to make 12 mini cups:

  • 220g of dark chocolate (chips or bar will do)
  • 1/2 cup peanut butter (smooth is better but chunky will do!)
  • 1/8-1/4 cup icing sugar
  • a pinch of salt

IMG_2310  

Chop and then melt the chocolate in the microwave on medium heat. I did about 75g at a time and it took about two minutes for that amount, though you should check every 45 seconds or so to make sure it's not in danger of burning. Once melted, give a good stir and pour into mini cupcake papers. Spread around the sides to coat. The chocolate on the bottom should be about 1/2 cm's worth.

IMG_2311  IMG_2312

Once all of the papers have been coated, put your tray in the freezer for about 30 minutes. Before you take the tray out of the freezer, heat your peanut butter for a minute or two in the microwave then add the icing sugar and salt and mix well. Put about a centimeter's worth of peanut butter in the centre of your cups and then pop the tray back in the freezer for another 30 minutes or so - just until it's hardened a bit.

IMG_2314

Remove from the freezer, re-melt your chocolate and coat the peanut butter until the chocolate comes up to the top line of the chocolate sides of the cup - try to make the tops as level as possible - the top should be flat, not cone-shaped. Put the tray back in the freezer for at least another hour, remove and then carefully peel the papers off the cups. Done!

IMG_2316

I store these in the fridge and pull out a bit before serving so they are closer to room temperature.

IMG_2318

So, Vegan MoFo is over! My idea was to post every day, and I'm happy to say I only took a few days off throughout the month. I'm happy to have tried new things this month and be inspired by so many other blogs - plenty of which I will be keeping up with in the future. Thanks to everyone who stopped by this month and please come back - I've got plenty more ideas of yummy things to make in the next few months!

IMG_2319

Saturday 29 October 2011

Veg McMuffin and Boathouse

I am slowly making my way through my Yves and Tofurky stash that I brought back from the US with me (it lasts ages in the freezer!). These vegan deli slices are far, far superior than anything available in Australia, and were a fraction of the price. I know I should be supporting local manufacturers, but I don't really like any of their similar products.

One of my favourite ways to use the Yves Canadian bacon slices is making "egg" McMuffins. If only there was a better word to describe this sandwich! I used the vegan omelette recipe from Vegan Brunch and poured it into egg rings to make nice, round, fluffy "eggs".

IMG_2291  IMG_2292  IMG_2293

Because they are thicker than the omelettes, they do have to be cooked a bit longer so they are cooked through.

IMG_2294  IMG_2295

To make the sandwich, I toasted some English muffins, and then layered thusly: bottom of bun > mayo > egg > bacon > cheese > hot sauce > egg > dijon mustard > top of bun.

IMG_2296
IMG_2299


To work off some of the Vegan MoFo extravaganza of butter, mayo, cheese, egg and meat, after breakfast the bf and I took a walk along the river to the Studley Park boathouse on the Yarra to watch giant geese and sip soy lattes. What a beautiful day!

IMG_2302

IMG_2305

IMG_2306

Friday 28 October 2011

Ca$h Money Butter Chicken

...so called because it is, ahem, super-rich. It's not often I buy this kind of meat substitute, but on the rare occasion that I do, why not go for it and make the kind of super-unhealthy dish that many meat eaters will find at the cheap takeaway Indian place!

From Min Phat supermarket:

IMG_2285

Since I used a pre-packed spice paste, this was a pretty damned easy dish to make. I followed the instructions on the pack and as far as ingredients went - all I needed was the paste, Nuttelex, an onion, some cream and the chicken. I also used some fresh turmeric root I found at the Safeway on Victoria St., Richmond (they also have galangal root - cool!) for extra colour, and a bit of sour cream for garnish (coriander leaves would have been lovely as well).

IMG_2286

This was my first time using the soyatoo and I wasn't too impressed. Despite all my shaking, the liquid and solids were still separated when I poured it out of the box - and it didn't blend too well into the rest of the sauce. Next time, I might just stick with sour cream.

IMG_2287  IMG_2289  IMG_2288

It was pretty good, all up, but so ridiculously rich that by the time I was finished, I felt a bit queasy. Might have to have just some plain fruit for breakfast tomorrow...

IMG_2290

Thursday 27 October 2011

Handmade Pirogies Your Polish Grandmother Would Kill For

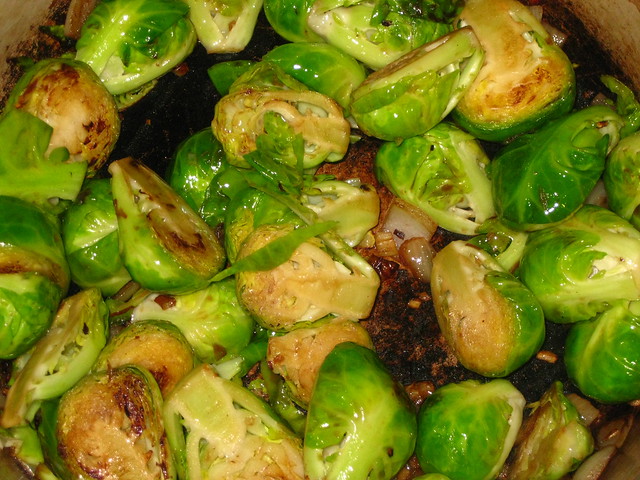
Today I am doing a favourite-food double-post. Aside from mac & cheese, hash browns, and brussels sprouts, pirogies are one of those desert island foods I could probably eat every day of my life and not get sick of. The main reason I don't eat them every day, is because making them takes quite awhile and frozen vegan pirogies are not available in Australia! The great thing about the pirogi, besides how awesome they taste, is that they were originally a peasant food - which means cheap, buttery, and filling.

There are so many pirogi dough and filling recipes out there, it's hard to know which is the best. I have made the dough using various recipes and I never find a huge difference - so I go with the one that uses the smallest amount of precious sour cream. Pirogi dough is quite soft and can be difficult to work with a pasta machine, but I am allergic to hand-rolling so next time I might try adding a bit of besan to make it easier to work with. For now, though, here is the recipe - it takes about three hours if you're quick and makes about 40 pirogies:

Note: You need a LOT of onions for this recipe - have at least 1 kg on hand per 20 pierogies.


Ingredients for the filling:

  • 6 medium potatoes (any potato that is good for mashing will do)
  • 3 small onions
  • 1 heaping tbsp vegan sour cream
  • 2 tsp salt (more to taste)
  • 1 tsp black pepper (more to taste)

Peel and cut the potatoes so that each potato is cut into 12 pieces. Boil them until tender. While the potatoes are boiling, mince the onions and cook them in a small pan. I like to cook them until they are "sweaty" - basically, not raw but not yet starting to turn brown. Once the potatoes are done, drain them and mash them. Add the sour cream, salt and pepper and mash mash mash! Once nice and smooth, add the onions and stir them in until well combined. Taste the filling and add more salt and pepper if needed. Set aside to cool.

Ingredients for the dough:

  • 3 tbsp canola oil
  • 1 cup warm water
  • 3 cups AP flour (plus a lot extra to use while rolling)
  • 1 tsp salt

Sift or mix the flour to get the lumps out, add the salt and then the wet ingredients. Mix until well combined. Knead a little bit until the dough is well held together. The dough needn't be smooth and should be a bit sticky. Place in a covered bowl and set aside for at least half an hour.


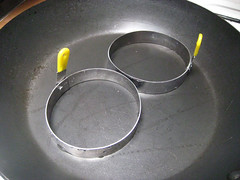
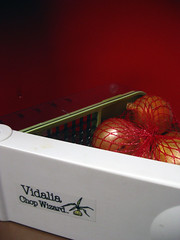
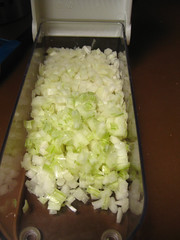
Next, you need to dice a mountain of onions. You can do it by hand, or if you are lucky you will have one of these to use:

IMG_2259  IMG_2262

Dice 6-7 small to medium sized onions and set aside. If you have a 1kg bag of onions, use the three smallest for the filling and the rest for the "sauce" - this is enough for 20 pirogies. If you will be eating more (rather than freezing leftovers for later) you will need more onions.

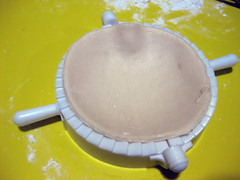
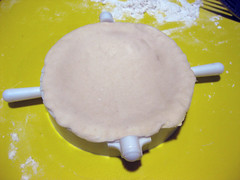
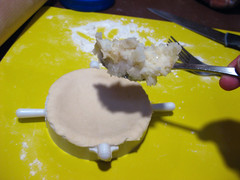
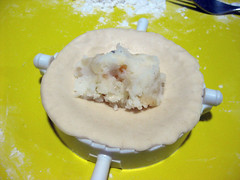
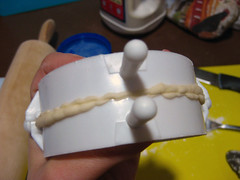
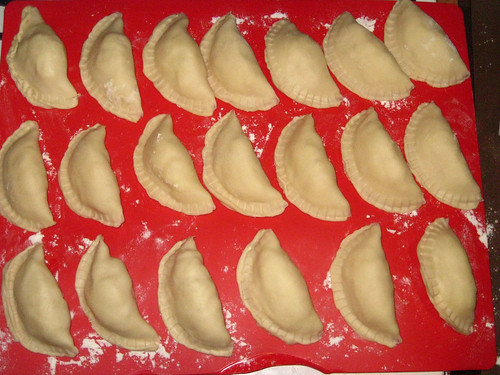
Next, roll out your dough (I use a pasta machine up to level 3). Basically, it should be thicker than pasta dough but thinner than pizza crust. Cut holes in the dough of about 3.5" in diameter. If you have a dumpling maker (a set of three is a whole $2.50 at most $2 shops) use that, otherwise you can make the pirogis by hand using a fork to crimp the edges. If you have a dumpling maker, stretch the sides of the dough to the edges and place a heaping teaspoon of filling in the middle. Fold inside, press tightly, open, and pull out the pirogi. 

IMG_2265 IMG_2266 IMG_2267 IMG_2268 IMG_2269

Set your pierogis aside on a floured sheet.

IMG_2271

Once your pirogies are all folded (or if you're good at multi-tasking, once they're 3/4 done), put your onions in a large pan on medium heat with about two heaping tablespoons of melted Nuttelex (don't worry, you can add more later!)


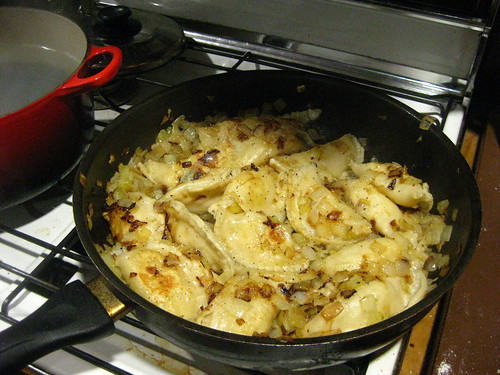
Put on a large pot of boiling water. Once your onions have started to brown is when the pirogies should go into the pot. Cook them up to eight at a time for about three minutes. Do not judge their doneness by if they float or not - it's better to have a taste of a corner if you're unsure. Throw a bit more Nuttelex into your pan before you add the pirogies, then fish them out of the boiling water with a slotted spoon and put in the pan with the onions.


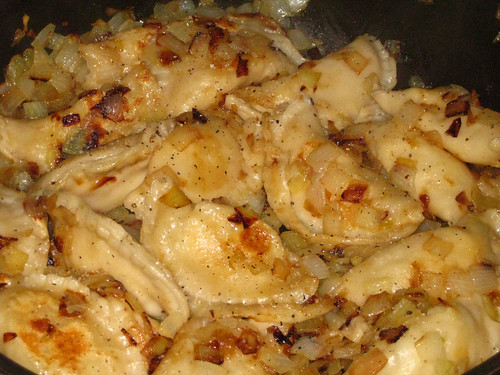
Cook until the onions are nice and caramelised and the pirogies are crispy and golden brown on each side. Salt and pepper well.

IMG_2277 IMG_2279

Freeze any uncooked pirogis on the floured sheet, then, when frozen, remove and chuck into a container and put back in the freezer. this way your pirogies won't freeze together and break off when you want to cook them.

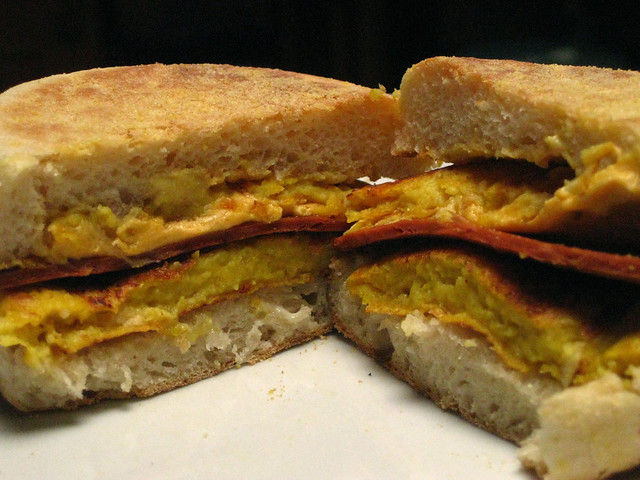
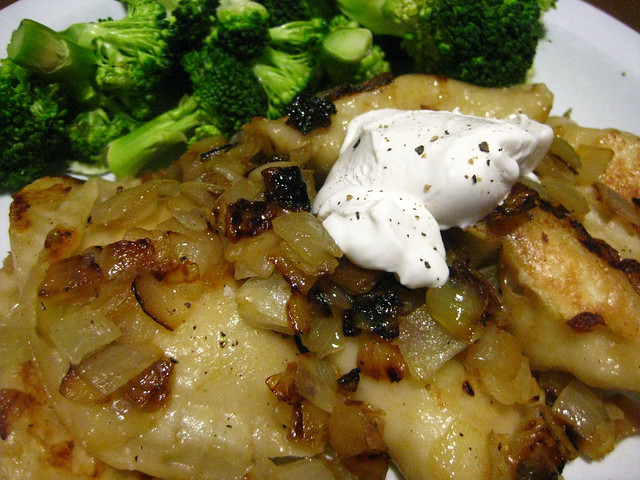
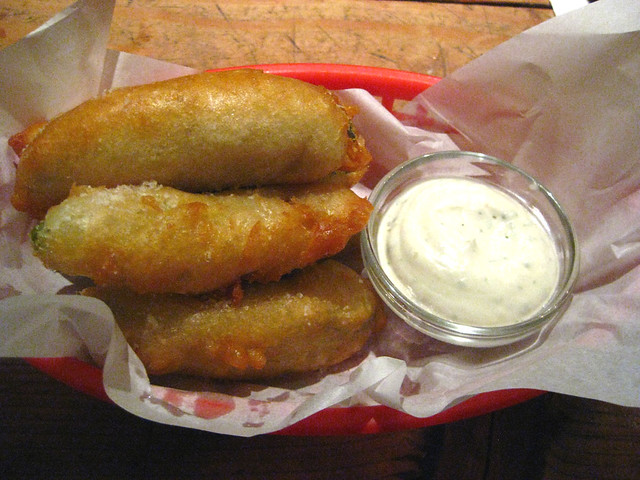
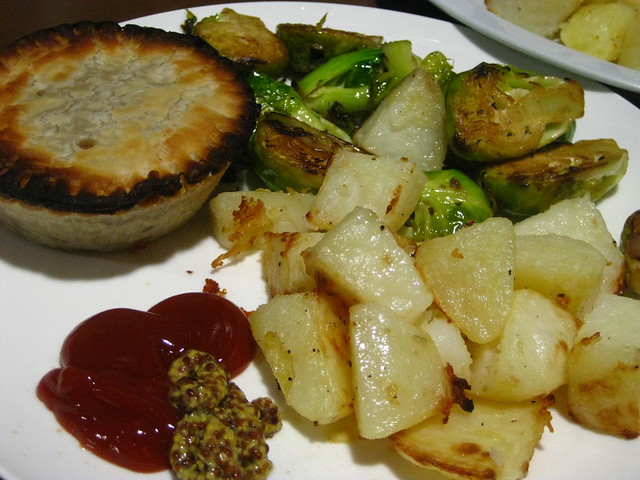
Serve your pirogies with a giant spoonful of sour cream and a bit of extra pepper (and salt if necessary) and a side of something healthy, like broccoli.

IMG_2281


Favourite Things: Mac and Cheese

Mac and cheese is one of my favourite foods. It is a simple idea, but vegan versions of the dish can sometimes be hard to get right. In the US this year, I probably tried about six different varieties of M&C at various restaurants. Some were great, some were okay - one was like soup...but all were quite different. (My favourite, by the way, was the M&C at the Veggie Grill - a chain in and around Los Angeles.)

So, on the way back to Australia, I felt it was my obligation to stock up on one of my favourite US grocery items - packets of Road's End Mac & Chreese mix. (Shout out to Food Fight Grocery - they're only $1 a pack there!) As long as it is non-dairy (and you don't bring enough that it looks like you're importing them for sale!) Australian Customs do not care if you bring in 20 packs. The same goes for any other vegan cheeses you bring in. (I froze my Teese, Sheese and Daiya up until I left for the airport and they were fine by the time I got back to Melbourne)

IMG_2283

So, for a quick and yummy lunch, I boil some shell pasta (that box in the photo on the right is empty and I use it to figure out how much pasta to make) and follow the instructions on the packet to make the chreese - though I sub soy milk for water and add a bit of cayenne pepper, black lava salt and black pepper, some chunks of Teese and a bit of toasted breadcrumb. 

IMG_2128

Served with tomatoes on the side, and I am one happy girl!

Tuesday 25 October 2011

Lightning-Fast Bean Salad and Liebster Award

Tonight's dinner was leftover roast from Sunday, a few garlic-cooked mushrooms and this bean salad that I made in, literally, about three minutes.

Ingredients:

  • one can of beans (I used cannelli beans, but a four-bean mix would work as well)
  • juice from 1/4 lemon (I squeeze the whole lemon and store the leftover juice in a container to use later)
  • splash of balsamic vinegar
  • handful of chopped parsley
  • half a handful of finely diced red onion
  • five grinds each of salt and pepper, more to taste if necessary
Drain and rinse the beans. Mix all the ingredients together, and adjust with extra of whatever extra is needed. That's it! This is a great side dish to roasted vegetables, as it's a bit wet and nicely acidic. 

IMG_2227


In other news, I've been nominated for my first blog award by the lovely Ms K over at one of my favourite blogs, In the Mood for Noodles. Behold:


It is called the “Liebster” is German and means ‘dearest’ or ‘beloved’ but it can also mean ‘favorite’. The idea behind this award is to bring attention to bloggers who have less than 200 followers and show your support during Vegan Mofo! 

The rules of winning this award are as follows:
1. Show your thanks to those who gave you the award by linking back to them.
2. Reveal 5 of your top picks and let them know by leaving a comment on their blog.
3. Post the award on your blog.
4. Enjoy the love and support of some wonderful people on the www!


I most definitely have less than 200 followers, and am very honoured that my humble, very new, blog has been recognised. 


So, here in return are some of the blogs I've been enjoying during Vegan MoFo. I picked all "International" blogs, as the Internationals aren't eligible for most of the awesome prizes up for offer at Vegan MoFo Headquarters, so I thought I'd share some extra love around... I hope all the blogs I picked haven't gotten nominated for the Liebster yet, but if they have, then they probably deserve this award and more! In no particular order:

1. Totally Veg (Austria) - The design of this blog is so lovely - I am particularly enamored with the banner, it's beautiful. Also, the pictures are great and the blogger, C, even takes the time to blog in two languages!

2. Elite Food (Finland) - I must admit being a bit of a Finnophile (is that a word?!) and all the food in this blog looks so yummy and comforting, just check out those carrot crepes with broccoli and mushroom filling!

3. Vegan on the Prowl (India) - I feel like I'm learning so much from reading this blog - one thing I have yet to fully grasp is how to combine spices in Indian food - it is so complex! Not to say this blog is always about Indian food - it is quite diverse - and the writing is very entertaining.

4. An Auckland Vegan (New Zealand) - Moira's pictures are all so fun to look at - and I have loved reading about her recent trip to Thailand...all of the photos of street food and awesome veg food she found in restaurants just make me want to reach through my screen and grab it!

5. The Modern Housewife Series Vol. I (Scotland) - Having recently had a few months off of work, I can relate to performing many housewife-like activities, so I am having fun reading about the housewifery these "three modern housewives" get up to - plus everything they cook and craft looks delicious!

Monday 24 October 2011

The Gasometer Hotel

This weekend I decided to let others cook for me! On Sunday the bf cooked an amazing pile of roasted veggies, garlic asparagus and some kind of chili-mushroom concoction that was soo yummy. On Saturday, after a few drinks at the Gem bar, we decided to head over to the Gasometer for dinner. (My last experience with dinner at the Gem involved paying $16 for "stuffed roasted red peppers" - the only vegan thing on the menu - a dish which turned out to consist of one bland, overpriced stuffed pepper. I'm now boycotting them as a dinner destination.)

At the Gasometer, we were lucky to get a table straightaway, as the place filled up very, very quickly - and were surprised to find a new (waterproof!) menu. They are still sticking to the American food theme  and really going for it, with some crazy foods not found elsewhere this side of the Pacific!

I had the vegan chicken & waffles, with sides of mac & cheese and potato salad ($21 for the plate), and also got a basket of fried pickles with "ranch" sauce ($10 for eight) for everyone to share. I'm not usually a fan of sweet & savoury on the same plate, but I had missed getting to try chicken & waffles on my last trip to the US, so I felt obligated to order them. These chicken and waffles were so yummy and so filling, and the sides were great as always. (I ended up taking home two chicken pieces and half the waffle, the portion was so big.)

IMG_2221

But my favourite part of the meal was the fried pickles. Let's just say I had a dream last night starring those pickles and I will be returning very soon for some more. (I am also wondering where the hell they got Vlasic brand pickles from! If anyone knows where to buy these in Melbourne, please let me know!)

IMG_2222

The only downsides of last night's visit was the time between when me and my bf got our food and when the rest of the table did. We only ordered a few minutes apart, but it looks as if another few tables somehow squeezed in between. And also, my friend's main (the buffalo tofu salad) only came with one side and she was told by our server it only comes with one, which wasn't mentioned on the menu nor by the person who took her order. So, that was weird and kind of annoying, but otherwise, I am really impressed with how the Gasometer has done for itself - it was so busy in there, and it's always exciting to see what is new on the menu/on the beer taps - and, being the only pub outside of Brunswick where half the menu is vegan, I'm glad they're only a short walk from home!


Gasometer on Urbanspoon

Friday 21 October 2011

Crispy Polenta with Vegetables and Balsamic Reduction

Ah, the word "reduction" makes a dish sound so fancy, doesn't it! I'm pretty sure this is my first attempt at a reduction sauce of any kind, and it turned out pretty yummy. First, I made the polenta according to the instructions on the packet. Fifteen minutes of constant stirring is a very good workout, let me tell you. When it was cooked (I kept it on the heat a minute or two longer than the recipe on the bag instructed) I poured it into a container that I thought would be most suitable to my preferred size and shape of polenta pieces. I let the polenta sit until it stopped steaming, then I covered it and popped it in the fridge for about 30 minutes.

While the polenta was cooling I went on to make the balsamic reduction. Which meant - more constant stirring! This recipe is so easy and pretty fool-proof. Just pour, into a small saucepan, an amount of vinegar which is double the amount of sauce you want to end up with. Put the heat on high and whisk, whisk, whisk. Keep whisking until the sauce is reduced by at least half and has a syrupy consistency (I was a bit unsure about when to pull it off the heat and then - poof! - it was suddenly right). If you would like to make it a bit sweeter, add a bit of sugar while it's cooking. The sugar made it yummy but I think it altered the texture to be a bit taffy-like when cooled.

By now your polenta should have moulded into the shape of your container. I cut some slices out, sprayed a pan with cooking oil and cooked them for about 20 minutes, flipping once the bottom was a golden brown.

IMG_2217

They can cook for a while without burning, so just cook them until you they reach your desired crispiness. Plate with a generous drizzle of balsamic reduction and some cooked veggies.


IMG_2218

Linda Louise McCartney Pies

This week I picked up some Linda McCartney-brand pies from Piedimonte's (yes, her middle name was Louise!) Linda's frozen foods line started in 1991 but I think the products have only recently been made all-vegan because I remember, as a kid, my mother wouldn't buy them because they had egg or something in them. 


So this year, when I found them at a whole foods shop, I had a check of the ingredients and, well, I didn't even need to - the box is marked vegan in a few places! I bought a box then (a few months ago) and, despite following the instructions correctly (and having an oven thermometer!) they still turned out cold on the inside and a bit burnt on the outside. But when I spotted them again this week for only about $5 for a box of four, I thought I should give them another go. 


This time, they again turned out a little burnt on the outside (wtf! must remember to put on the very bottom of the oven) but nice and hot on the inside. The texture is quite meaty and they are very flavourful. Could use a bit of salt but then again, I think most things could use a bit more salt. I ate them with parboiled/roasted potatoes and sautéed brussels sprouts/onion/balsamic vinegar.


The best food in the world, brussels sprouts:


IMG_2210

IMG_2212

Thursday 20 October 2011

Super-Chunky Hot Love Muffins

Muffins have been on my mind a lot lately. They are the perfect snack - a little bit junky, but filled with fruit so not really that junky. So when I saw some strawberries for cheap yesterday a muffin-shaped lightbulb lit up above my head.

The amount of fruit in my recipe is way too much fruit for the muffins to properly stick together (which is kinda how I like 'em), so prepare to eat these with a fork! Oh, and the ones in the pictures should probably be fluffier but I was so excited to eat muffins that I didn't sift the dry ingredients, and probably didn't distribute the baking soda/powder well enough...

Ingredients:

  • 1 1/2 cups plain white flour
  • 1/2 cup sugar
  • 1/4 tsp salt
  • 1 tsp baking powder
  • 1 tsp baking soda
  • 1 cup soy milk 
  • 1/3 cup canola oil
  • 1 tsp vanilla extract
  • 3/4 cup sliced strawberries, plus 3/4 cup diced apples (if you want your muffin to stick together better then ditch the apples!)
  • extra slices of strawberries/apple skin for decoration.

Sift together (or at least mix well!!) all the dry ingredients and wet ingredients (ex. the fruit) in two separate bowls while your oven is pre-heating to 190'C. 

Slowly pour the wet bowl into the dry bowl, stirring slowly. Make sure ingredients are well combined, but don't stir too much (it will knock the fluff out of your muff!). Add the fruit and fold in. 

IMG_2199  IMG_2201


Pour into muffin cups and bake for 15-20 min. Put a heart-shaped strawberry in the middle of each cup and some thin slices of apple peel if you're feeling fancy! 

IMG_2203

Halfway through I turned the tin, and sprinkled a bit of raw sugar on top.

After the recommended cooking time, stick a sharp knife into the center of the ugliest muffin and, if it comes out clean, pull them out. If you've used muffin liners, pull the muffins out and let them cool on a cooling rack. If you've used a greased muffin tin, let the 'ffins cool for about 10-15 minutes before removing from the tin. (Although if you use a much fruit as I did I'm really not sure if they will come out in one piece!)

IMG_2204